Export Scenes and Visualizations to CARLA
To run cosimulations with CARLA, you must first export your RoadRunner scene data. This topic covers two different workflows for exporting a scene for CARLA cosimulation:
Export RoadRunner Scene to OpenDRIVE — Enables you to quickly view a cosimulation using the default CARLA renderer.
Build CARLA From Source — Enables you to capture scene details and generate equivalent visualizations for your scenario.
Export RoadRunner Scene to OpenDRIVE
Exporting your scene data to the OpenDRIVE® format, enables you to quickly view cosimulations with the default CARLA renderer.
Open your scene in RoadRunner.
From the menu, select File > Export > ASAM OpenDRIVE (.xodr).
In the export dialog box, change the file path to the
Scenesfolder of your RoadRunner project.
Build CARLA From Source
Building CARLA from its source captures all of the detail from your RoadRunner scene, including traffic signal, collision, and material data, enabling more accurate cosimulation. This export workflow extends the workflow described in Export to CARLA to show an equivalent visualization in RoadRunner Scenario and CARLA.
Export Scene from RoadRunner Scenario
Open your scene in RoadRunner.
Export the scene using the CARLA option. From the menu, select File > Export > CARLA Filmbox (.fbx, .xodr, .rrdata.xml).
In the Export CARLA dialog box, set the mesh tiling on the Filmbox tab and the OpenDRIVE options on the OpenDRIVE tab.
Click Export.
Build and Add Plugins to CARLA
Build CARLA from its source. For more information, see the Windows Build page of the CARLA instructions.
Note
The
gitcommand clones the CARLA source code toC:\, and Unreal Engine® toCarlaRepository\carlaC:\.UnrealInstall\UnrealEngineCarlaRepositoryUnrealInstallCopy the CARLA RoadRunner plugins to the folder
C:\.CarlaRepository\carla\Unreal\CarlaUE4\PluginsUpdate the Microsoft® Visual Studio® project. Right-click the project file
C:\and select Switch Unreal Engine Version.CarlaRepository\carla\Unreal\CarlaUE4\CarlaUE4.uproject
Add Maps and Rebuild CARLA
Start Unreal® and open the Unreal project file,
CarlaUE4.uproject.Using the Content Browser, create new
RoadRunner\MapsandRoadRunner\Staticfolders.Drag all the files exported from RoadRunner to
RoadRunner\Static, and follow the instructions in the import wizard.Save
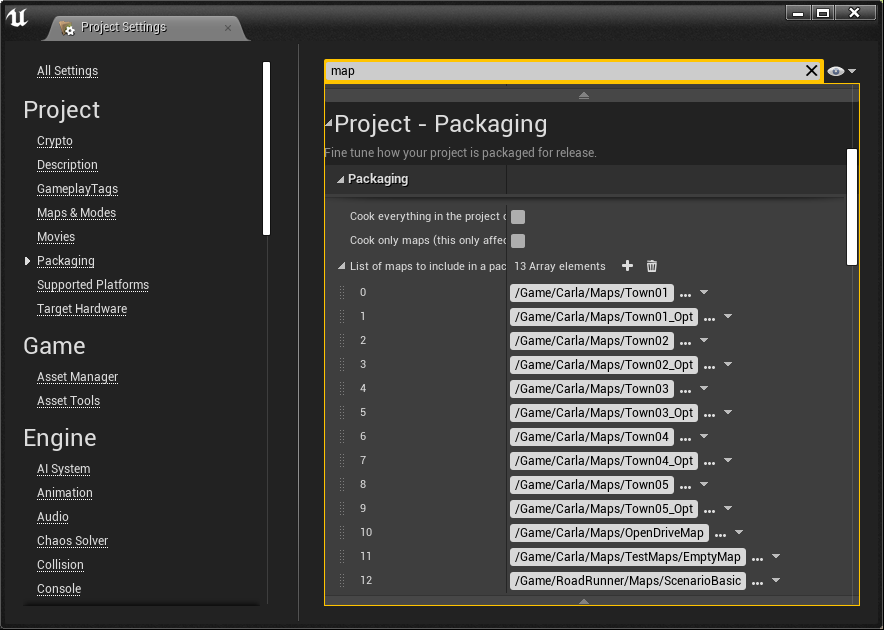
ScenarioBasic.umapto theRoadRunner\Mapsfolder.In Project Settings, under Project > Packaging, add the map to the packaging list.
Close the Unreal Editor and save the assets when prompted.
Build the CARLA executable and package the new map to
C:\.CarlaRepository\carla\Build\UE4Carla\N_N_NN-dirty\WindowsNoEditorSet a Windows® environment variable,
CARLA_ROOT, toC:\.CarlaRepository\carla\Build\UE4Carla\N_N_NN-dirty\WindowsNoEditorTo do this, open Windows Settings and click System > About > Advanced System Settings. In the System Properties window, click Environment Variables and, in the System Variables panel, click New. Set Variable name to
CARLA_ROOTand Variable value toC:\.CarlaRepository\carla\Build\UE4Carla\N_N_NN-dirty\WindowsNoEditorUpdate the platform settings in
C:\Users\, whereusername\AppData\Roaming\MathWorks\RoadRunner\R20NNa\Scenario\Config\SimulationConfiguration.xmlusernameR20NNaR2023a, to these values.
<TimeOutValues>
<Event name="SimulationStartEvent" value="30000"/>
...
</TimeOutValues>
...
<Platform name="CARLA">
 <ExecutablePath>C:\CarlaRepository\carla\Build\UE4Carla\N_N_NN-dirty\WindowsNoEditor\CarlaUE4.exe</ExecutablePath>
 <StartTimeOut>60000</StartTimeOut>
</Platform>
The scene is now available in the CARLA simulation engine.
See Also
CARLA Cosimulation Workflow | Export to CARLA