Create Your First Model for Monitor and Tune with Host Target
You can use Monitor and Tune (External Mode) action to tune parameters and monitor a Simulink® model running on your target hardware.
Monitor and Tune enables you to tune model parameters and evaluate the effects of different parameter values on model results in real-time. When you change parameter values in a model, the modified parameter values are communicated to the target hardware immediately. You can monitor the effects of different parameter values by viewing the output signals on Sink (Simulink) blocks or in the Simulation Data Inspector (SDI) (Simulink). This helps you find the optimal values for performance. This process is called parameter tuning.
Create a Simulink Model
Start MATLAB®. From the MATLAB toolstrip, click the Simulink button.
Click the Blank Model template.
The Simulink Editor opens.
Add a required block using the quick insert menu. For example, Timestamp block.
Double-click anywhere in the model canvas. In the quick insert menu that appears, enter
Timestamp. A list of blocks appears. Verify that the Timestamp block from the UAV Toolbox Support Package for ArduPilot® Autopilots library is selected. Check the library name listed under the block name and the block description in the pane to the right of the search results.
Add the Timestamp block to the model by pressing Enter.
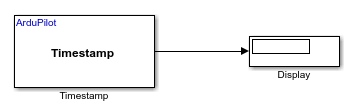
Add a Dipslay blocks and connect the blocks by creating lines between output ports and input ports. Then, save your model.
Configure Model Parameters for Host Target
Go to the Modeling > Model Settings to open Configuration Parameters dialog box.
In the Configuration Parameters dialog box, set the required parameters.
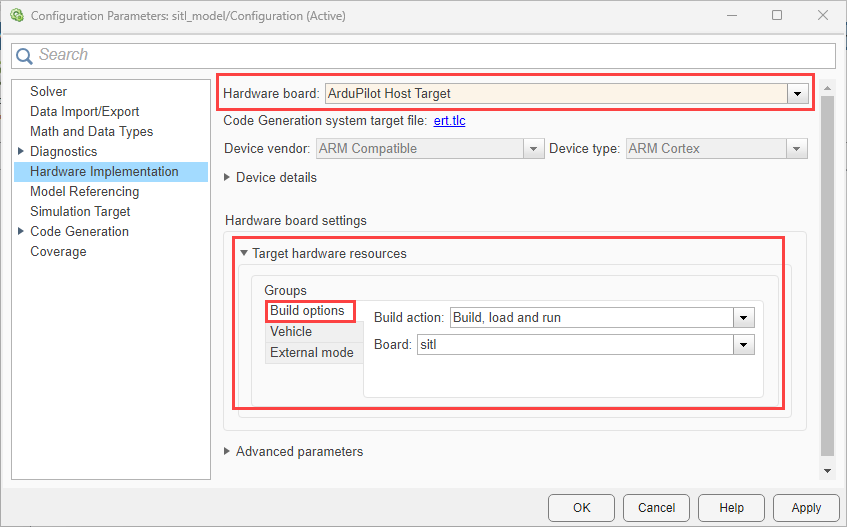
Click Hardware Implementation and select
ArduPilot Host Targetfrom the Hardware board list.In the Build options, Ensure that
Build, load and runis selected for the Build action andsitlis selected for the Board.Set the options for Vehicle.
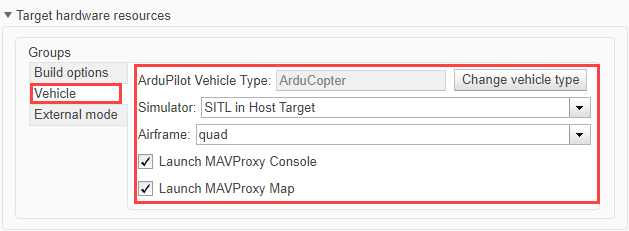
Select the required ArduPilot vehicle type.
For Simulator, ensure you select
SITL in Host Target.Select the desired Airframe from the drop-down list.
Select the options for Launch MAVProxy Console and Launch MAVProxy Map. This will automatically launch the corresponding SITL windows when you start the simulation.
MAVProxy Console: This window allows you to interact with and monitor the SITL simulation using command-line commands.
MAVProxy Map: This window displays a real-time map view of the simulated vehicle.
Verify the options for External mode.
You can use Monitor and Tune (External Mode) action to tune parameters and monitor a Simulink model running on the host target. For more information, see Monitor and Tune the Model Running on ArduPilot Autopilots.
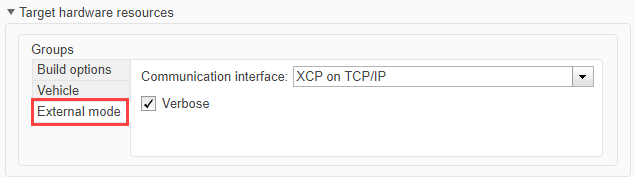
Verify the settings match exactly as shown in the image. Do not modify any of the options.
Do not change any other options.
Click Apply and OK.
Perform Monitor & Tune Simulation
The Monitor and Tune workflow in Simulink allows you to observe signal values and adjust parameters on your deployed algorithms in real time.
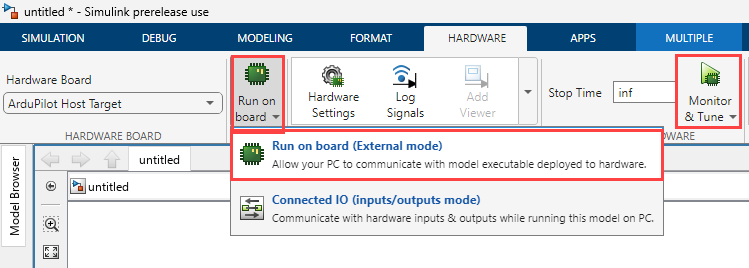
On the Hardware tab, in the in the Mode section, click Run on board and then select Run on board (External mode). If you see Connected IO selected instead of Run on board, click on it and choose Run on board (External mode).
Click Monitor & Tune.
Simulink connects to the deployed code and allows live monitoring and parameter adjustment.
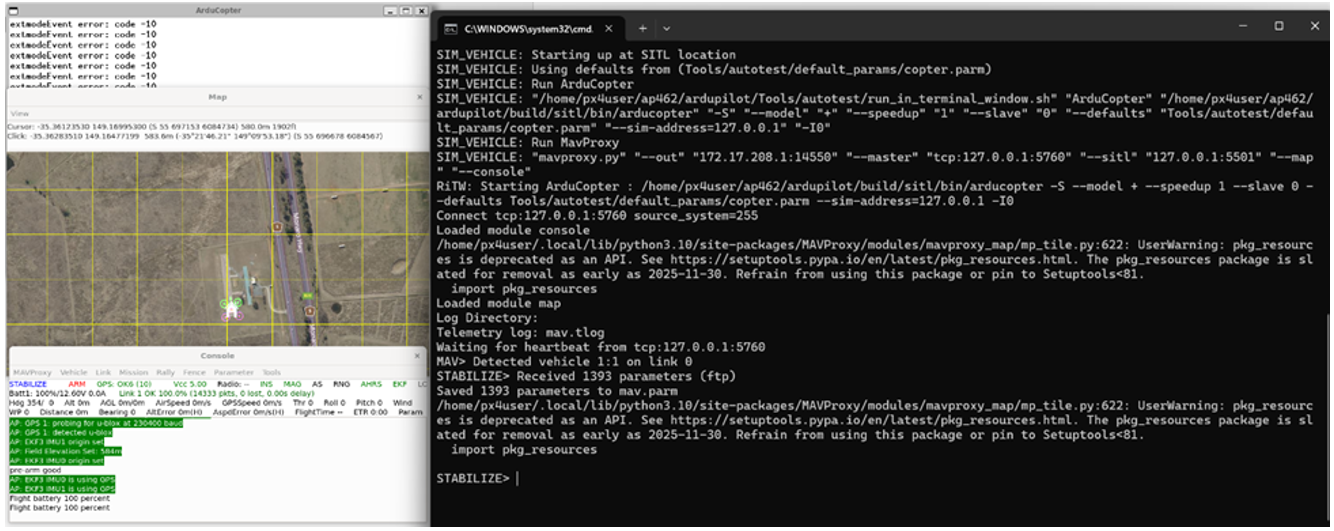
Wait for the Host Target to launch.
The SITL simulation environment (Host Target) will start automatically.
Wait for the ArduPilot SITL, MAVProxy Console, and MAVProxy Map windows to launch completely before proceeding.
Observe and Analyze Simulation Data
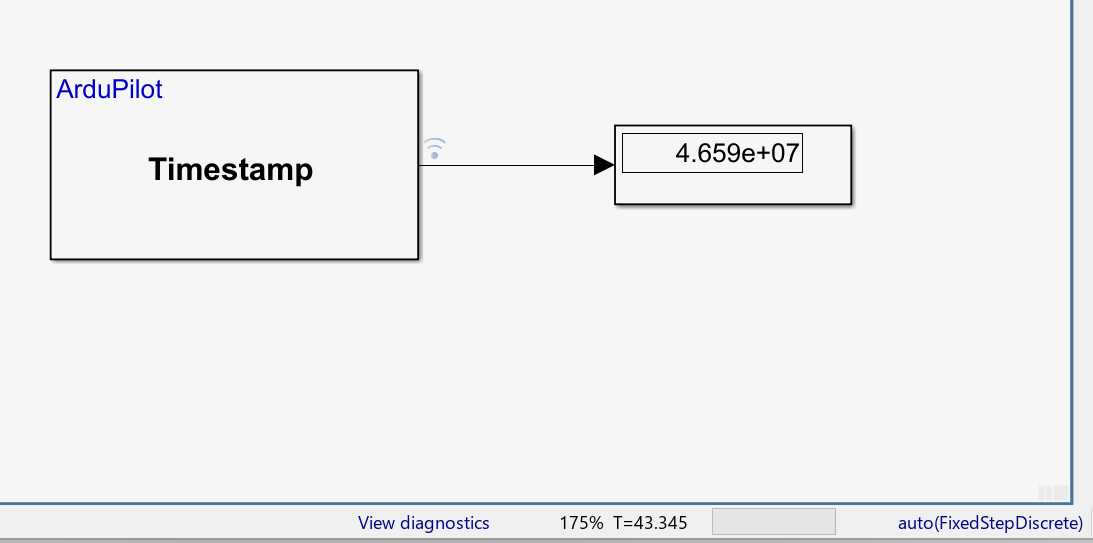
The Display block in your Simulink model will show the live output from the Timestamp block during the simulation.
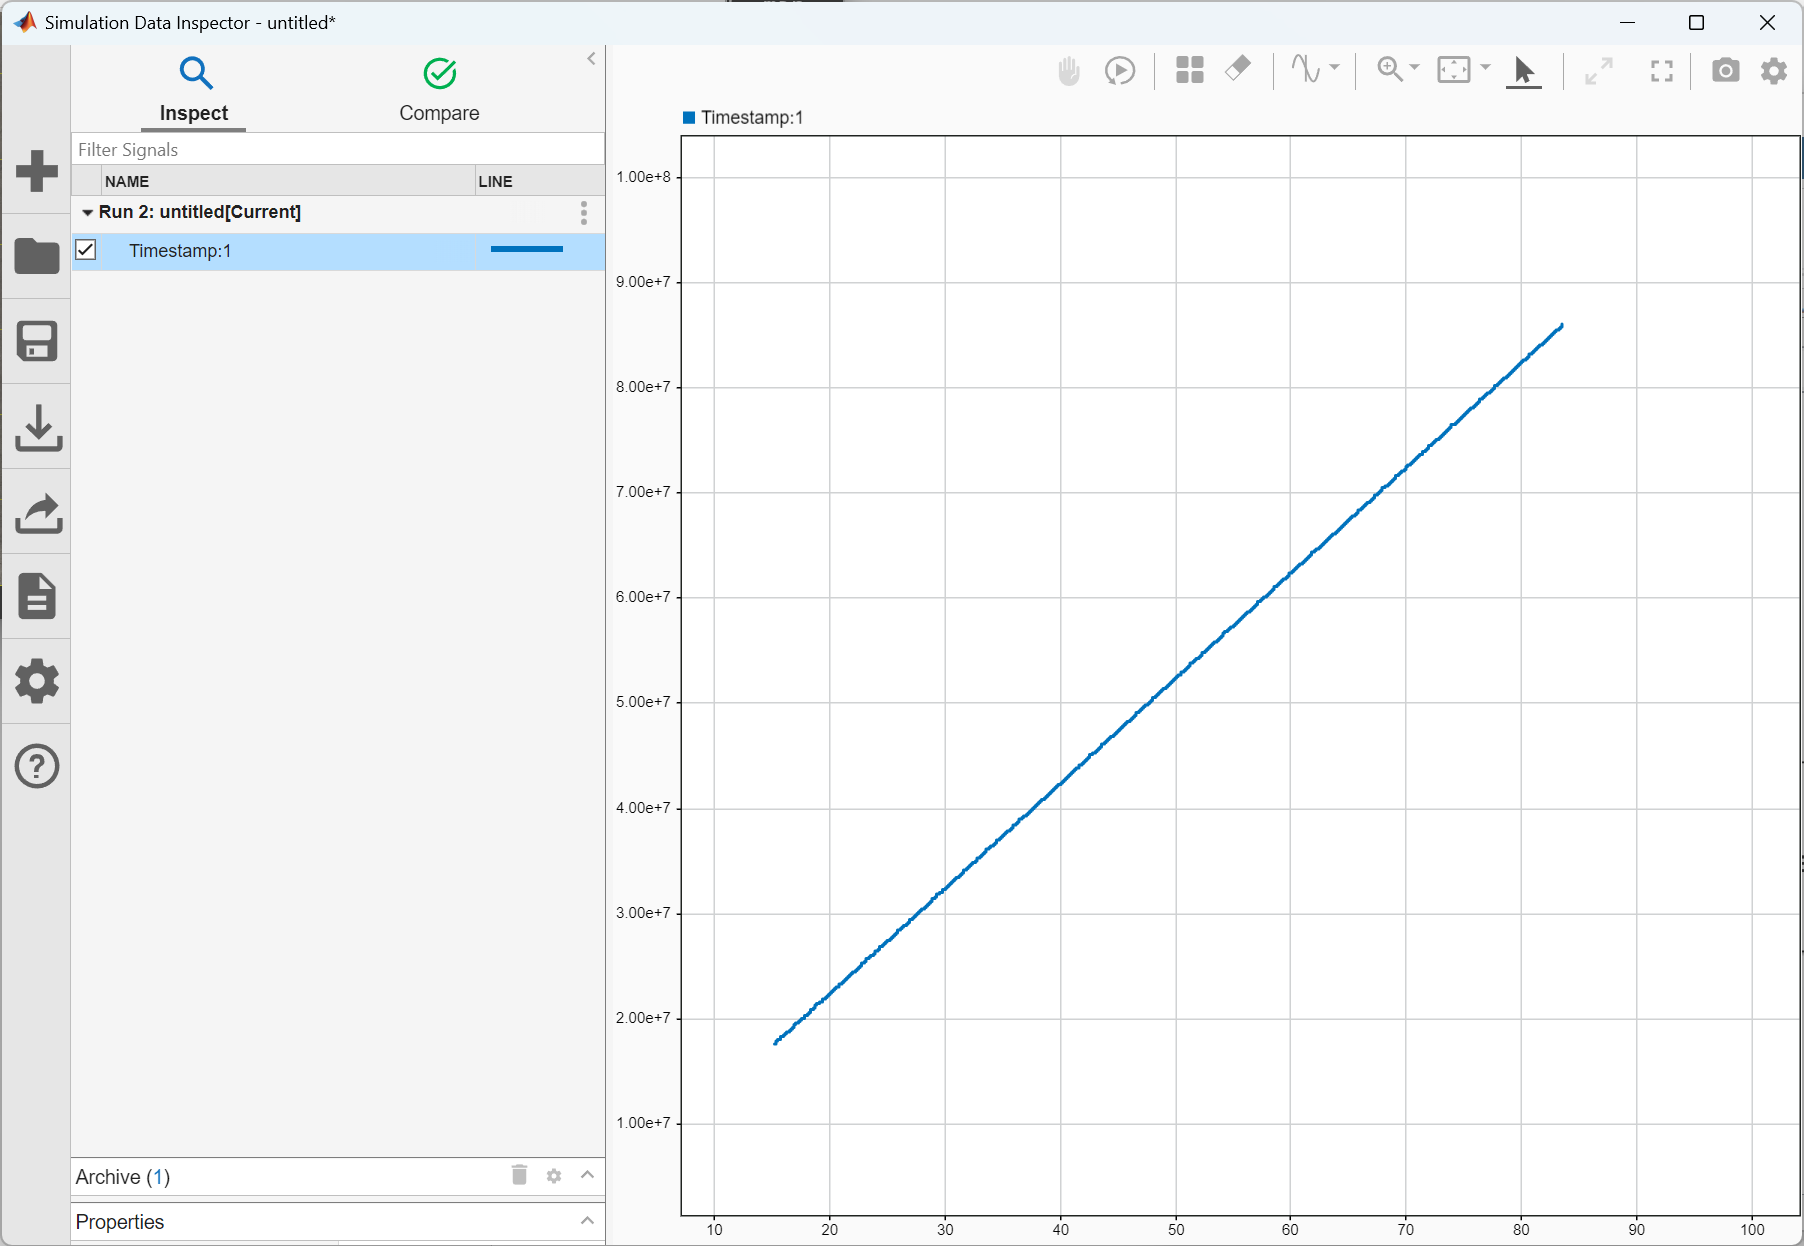
You can also visualize and analyze the recorded signal data using the Simulink Data Inspector.
The MAVProxy Console window allows you to interact with and monitor the SITL simulation using command-line commands.
The MAVProxy MAP windows gives a real-time map view of the simulated vehicle’s position and status.
See Also
Create Your First Model for Monitor and Tune with Cube Orange+ | Monitor and Tune the Model Running on ArduPilot Autopilots