Controlling Motor Speed of a Parrot Minidrone During Runtime Using External Mode
This example shows you how to use the External mode feature in Simulink® for speed control of motors on a Parrot® minidrone during runtime.
Introduction
Simulink's External mode feature enables parameter tuning while the model is running on target hardware, without stopping the model. When you change parameter values from within Simulink, the modified parameter values are communicated to the target hardware. The effects of the parameters tuning activity can be monitored by viewing the signals on Scopes or Displays in Simulink.
In this example, you will learn how to configure a Simulink model to run a simulation in External mode on Parrot minidrone, and control the speed of motors during runtime.
Prerequisites
Complete Spin the Motors of a Parrot Minidrone Without Flying the Drone.
Required Hardware
To run this example, you will need the following hardware:
Parrot Rolling Spider Or Parrot Mambo minidrone with fully charged battery and propellers
Micro USB type-B cable
Bluetooth Low energy (BLE) 4.0 support
Task 1 - View the Model and Set Up the External Mode
In this task, you will open the Simulink model and set up the External mode feature.
1. Connect the Parrot Minidrone to your computer as mentioned in Spin the Motors of a Parrot Minidrone Without Flying the Drone.
2. Open the parrot_external_mode model.

This model has already been configured for the Parrot Rolling Spider target. To learn how to setup a model for Parrot Minidrone, refer to Spin the Motors of a Parrot Minidrone Without Flying the Drone.
3. Go to Hardware tab and select Monitor & Tune to start the External mode.

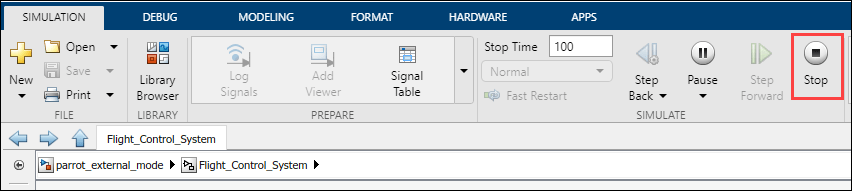
After the model build goes through successfully, the model waits for the start command from MATLAB® to start executing the code on the drone. It can be seen that the time in the Simulink model is frozen at 0s as shown in the below figure.

Task 2 - Start the Drone and Control the Speed of Motors
In this task, you can start the Parrot minidrone motors in External mode, change the parameter values in the Simulink, and view the change in speed of the motors in real-time.
1. Open the Parrot Flight Control Interface:
If you have selected the Launch Parrot Flight Control Interface automatically after build option in the Configuration Parameters dialog box (Hardware Implementation pane > Target Hardware Resources > Build Options), the Parrot Flight Control UI opens automatically after the build goes through successfully.
You can also open the Parrot Flight Control Interface from the command line.
>> Parrot_FlightInterface
To know more about Parrot Flight Interface, see Using the Flight Control Interface to Start the Drone.
2. In the Parrot Flight Control Interface, set the Power Gain and Flight Time as required.
3. Click START.
Once the Start command is received, the motors start spinning, and the Simulink model starts running in External mode. It can be seen that the time starts running on the Simulink model.
4. Open the Flight Control System subsystem.
5. The Accel2Motor subsystem takes the accelerometer values and spins a particular combination of motors based on the orientation of the drone. For example, all the four motors spin when the drone is kept on a flat surface.
Try tilting the drone vertically to its right by  . You can observe that only the 1st motor spins in this case.
6. While the model is running in External mode, view the accelerometer signals by opening the Scope.
7. Vary the motor speed using the slider and notice the change in speed of the motors.
8. Click STOP in Flight Control Interface in order to stop the External mode simulation.
Stopping the External mode simulation terminates the code running on the Parrot Minidrone. Before you can start another External mode simulation, you need to run the generated code again by clicking the Run icon on the toolbar of the Simulink window.
Select a Web Site
Choose a web site to get translated content where available and see local events and offers. Based on your location, we recommend that you select: United States.
You can also select a web site from the following list
Americas
- América Latina (Español)
- Canada (English)
- United States (English)
Europe
- Belgium (English)
- Denmark (English)
- Deutschland (Deutsch)
- España (Español)
- Finland (English)
- France (Français)
- Ireland (English)
- Italia (Italiano)
- Luxembourg (English)
- Netherlands (English)
- Norway (English)
- Österreich (Deutsch)
- Portugal (English)
- Sweden (English)
- Switzerland
- United Kingdom (English)