Segment Image Using Local Graph Cut (Grabcut) in Image Segmenter
R2026bThis example shows how to segment an image using Local Graph Cut (also known as grabcut) in the Image Segmenter app. With Local Graph Cut, you first draw an ROI around the object you want to segment. Then, like Graph Cut, you draw lines on the image, called scribbles, to identify what you want in the foreground and what you want in the background. The Image Segmenter app segments the image within the ROI automatically based on your scribbles. You can refine the segmentation by drawing more scribbles on the image until you are satisfied with the result.
Load Image into the Image Segmenter App
Read an image into the workspace, then load the image into the Image Segmenter app.
car = imread("car2.jpg");
imageSegmenter(car)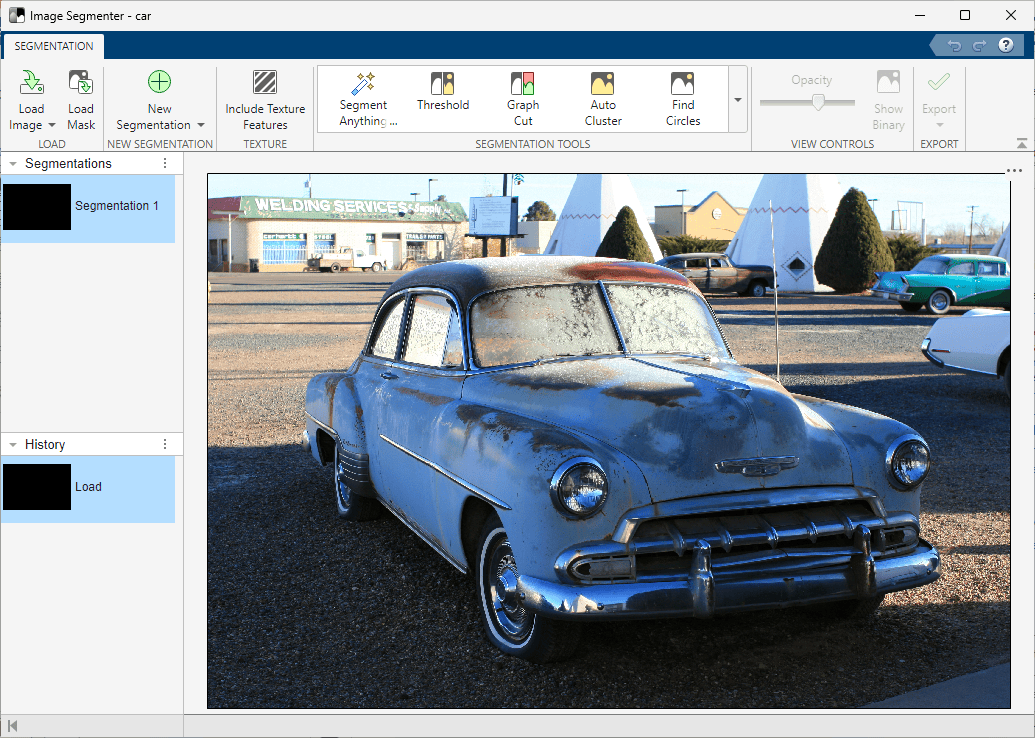
Use Local Graph Cut (Grabcut) to Segment Image
On the Image Segmenter app toolstrip, select Local Graph Cut.
The Image Segmenter app opens a new tab for Local Graph Cut segmentation. As a first step in Local Graph Cut segmentation, draw an ROI around the object in the image that you want to segment. When the Image Segmenter app opens the Local Graph Cut tab, it preselects the Draw ROI button. Position the cursor over the image and draw an ROI that encompasses the entire object you want to segment. To get a good initial segmentation, make sure the ROI you draw completely surrounds the object, leaving a small amount of space between the object and the ROI boundary. Make sure the object you want to segment is completely inside the ROI.
You can choose to draw a rectangular or polygonal ROI. Use the ROI Style menu to choose. To draw a rectangle, position the cursor over the image and then click and drag. To draw a polygon, click and drag the mouse, creating a vertex at each click. Double-click to finish the polygon. If you are not satisfied with the shape you drew, you can edit it. Right-click the ROI and choose Delete.
When you finish the ROI, the Image Segmenter app automatically segments the object in the ROI. The blue shading indicates the segmented area.
To refine the automatic segmentation, draw lines (scribbles) to mark any parts of the foreground that were not included in the automatic segmentation. After you draw the ROI, the Image Segmenter selects the Mark Foreground button automatically.
To remove areas from the segmentation that are not part of the foreground, mark those areas as background. Select the Mark Background option and draw lines inside the ROI to identify parts of the segmentation that should be in the background.
When you are satisfied with the segmentation, click Apply. The Image Segmenter app changes the color of the segmented part of the image to yellow.
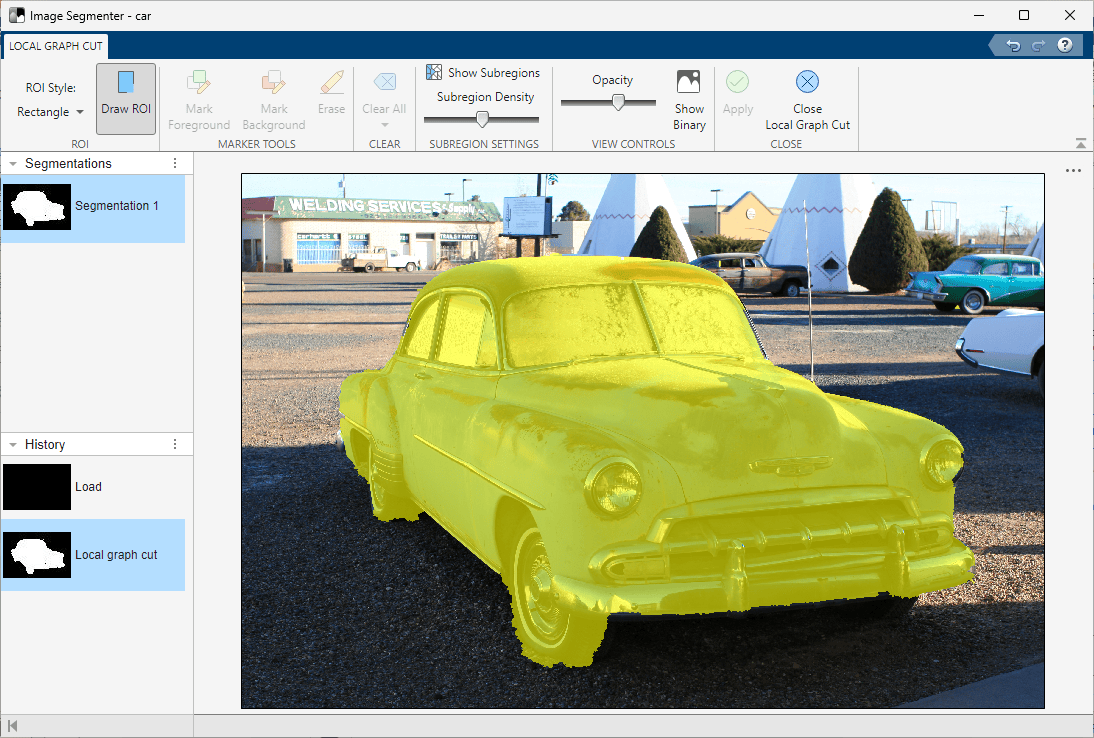
To view the mask image, click Show Binary. You can also view the binary mask image in the main Segmentation tab. To return to the main Image Segmenter app, click Close Local Graph Cut.
When you are satisfied with the segmentation, click Create Mask in the toolstrip on the Local Graph Cut tab. The app closes the Local Graph Cut tab and returns you to the Segmentation tab. You can then refine and save the mask image.

