Create Excel Add-In Using Excel Add-In Compiler App
Supported platforms: Windows®, Linux®, Mac
This example shows how to use the Excel Add-in Compiler app to package a MATLAB® function into an Excel® add-in. You can call the function using Microsoft® Excel.
Before R2025a: Create an Excel add-in using the Library Compiler as shown in Create Microsoft Excel Add-in from MATLAB Function Using Library Compiler App (R2024b).
Create MATLAB Function
In MATLAB, write a MATLAB program that you want to deploy.
For this example, create a function named mymagic.m.
function y = mymagic(x)
y = magic(x)
At the MATLAB command prompt, enter mymagic(5).
The output is a 5-by-5 matrix.
17    24     1     8    15
23     5     7    14    16
 4     6    13    20    22
10    12    19    21     3
11    18    25     2     9
Create Project and Compiler Task
Create a compiler task for your function using the Excel Add-in Compiler. Compiler tasks allow you to compile files in a project for a specific deployment target.
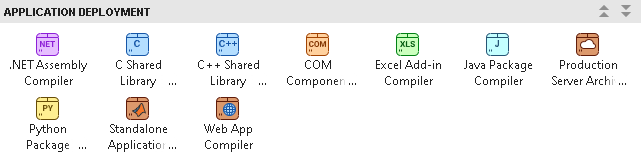
To open the app, on the Apps tab, expand the Apps gallery. In the Application Deployment section, click Excel Add-in Compiler.
You can also open the app using the excelAddinCompiler function at
the MATLAB Command Window.
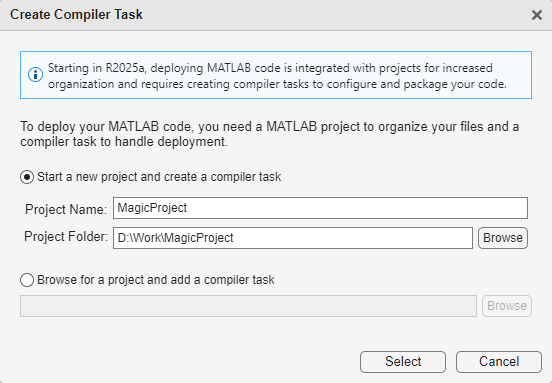
After you open the app, the Create Compiler Task dialog box prompts
you to add a compiler task to a new or an existing MATLAB project. For this example, select Start a new project and create a
compiler task and create a new project named MagicProject
in your working folder. For more information on creating and using MATLAB projects, see Create Projects.
A new compiler task named ExcelAddIn1 opens in the Editor. You can
compile code for other deployment targets by opening the Compiler Task Manager
or going to the Manage Tasks tab and creating a new compiler
task.
Specify Build Options
You can specify options for the Excel add-in before packaging to customize the building and packaging process. For instance, you can obfuscate the MATLAB code.
For this example, in the Exported Functions section of the
compiler task, click Add Exported Function and select
mymagic.m. In the Project panel, the file now has the labels
Design and Exported Function File.

In the Package Info section, replace the string
MyExcelAddIn with the name for your Excel add-in, xlmagic.
In the Build Settings section, replace the string
Class1 with the name for the class,
xlmagicclass.
View Code and Package Excel Add-In
To view code that contains instructions on building and packaging your component, click
the arrow next to the Export Build Script button and select
Show Code. On the right, a window opens that displays a deployment
script with the compiler.build.excelAddIn and compiler.package.installer functions that correspond to your build
options.
![]()
To create the Excel add-in, click Package.
The compiler generates files in the <compiler_task_name>/output
Test and Deploy Add-In
After creating the add-in, follow these steps to test the function in Microsoft Excel.
Open Microsoft Excel, click the File tab, click Options, and then click the Add-Ins category.
In the Manage box, click Excel Add-ins, and then click Go. The Add-Ins dialog box appears.
Click Browse and locate the add-in
xlmagic.xla.You are prompted to copy
xlmagic.xlato theAddinsfolder associated with your user name. You can choose to copy the add-in or run it directly. For this example, select YES. The add-in is copied and added to your workbook.Click OK to close the Add-Ins dialog box.
To test the add-in, select a grid of 3-by-3 cells in the Excel workbook.
Then, enter this custom function in the formula bar.
=mymagic(3)
Press Ctrl+Shift+Enter on the keyboard. The selected cells display this output.
8    1    6
3    5    7
4    9    2
For additional examples, open the file xlmagic.xls located in
matlabroot\toolbox\matlabxl\examples\xlmagic.
This spreadsheet contains three custom VBA macros that demonstrate ways to use the compiled
MATLAB function.
To distribute your add-in to end users, see Distribute Add-Ins and Integrate into Microsoft Excel.
See Also
Excel Add-in
Compiler | compiler.build.excelAddIn | compiler.package.installer