Configure the Desktop
R2026bBy default, the MATLAB® desktop is configured to support many common workflows. You can customize the desktop to better meet your needs by adjusting the layout.
Default Desktop Layout
When you first start MATLAB, the desktop appears in its default layout, which includes commonly used tools and panels. The desktop has a two-column layout, with the Files panel and Workspace panel on the left, the Command Window on the right, and the toolstrip across the top. Sidebars on the left and bottom of the desktop show the tools that are docked in the desktop.
You can use the sidebars to access the desktop tools in panels and change the desktop layout. To restore the default desktop layout, go to the Home tab, and in the Environment section, select Layout > Two Column (Default).
MATLAB Home Page
Since R2026a
You can quickly access your recent files, online training, and other resources
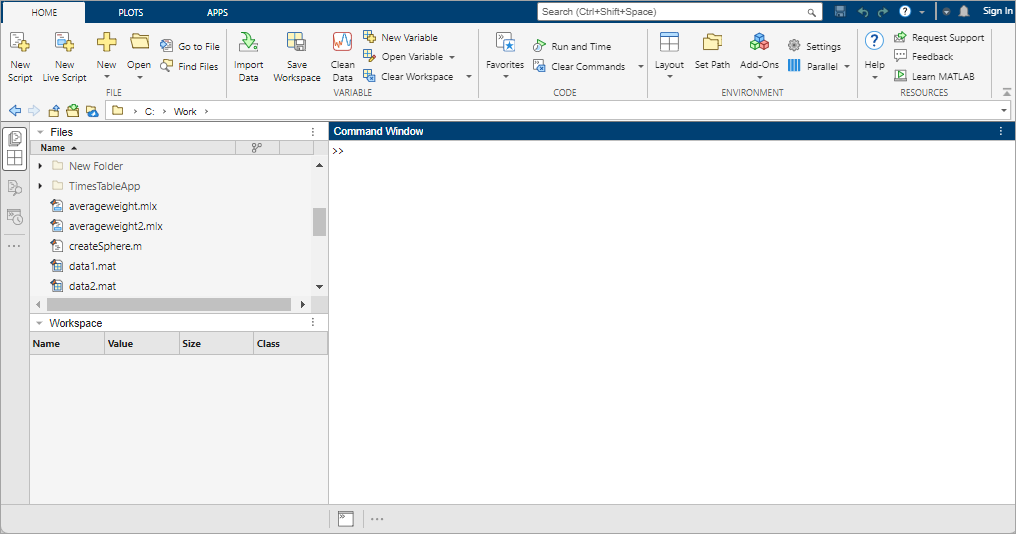
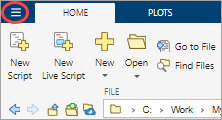
using the MATLAB Home page. To open the MATLAB Home page, in MATLAB, click the MATLAB Home button  to the left of the Home tab
on the toolstrip. Alternatively, you can use the Alt+M keyboard
shortcut.
to the left of the Home tab
on the toolstrip. Alternatively, you can use the Alt+M keyboard
shortcut.
Show and Hide Panels
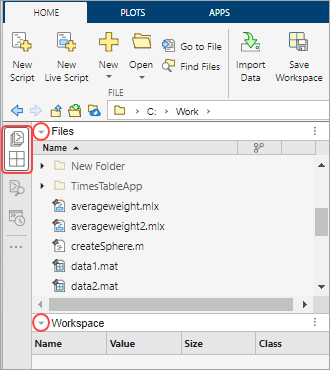
To show or hide a panel, click its icon on the sidebar. To collapse a single panel in a group, click the arrow on the left side of its title bar.
Open More Panels
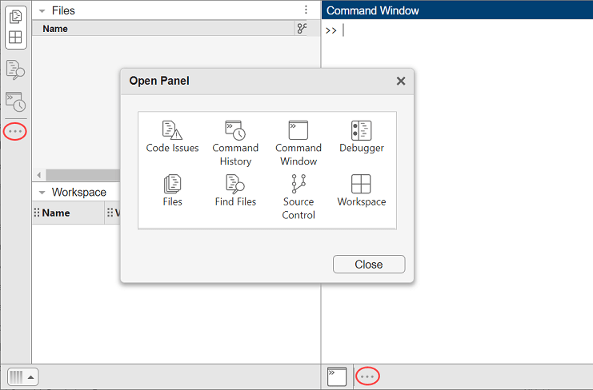
To open a panel that is not already open, click the Open more panels button on any sidebar. Then, in the Open Panel dialog box, select from the available panels. Alternatively, you can show common panels by going to the Home tab and, in the Environment section, clicking the Layout button. Then, in the Layout Options section, select one or more of the options in the list.
Group and Move Panels
You can organize panels into groups so that you can show or hide them together. To group panels, drag one panel's icon next to another panel's icon in a sidebar.
To move a panel, drag the panel's title bar or sidebar icon to the left, right, or bottom of the desktop.
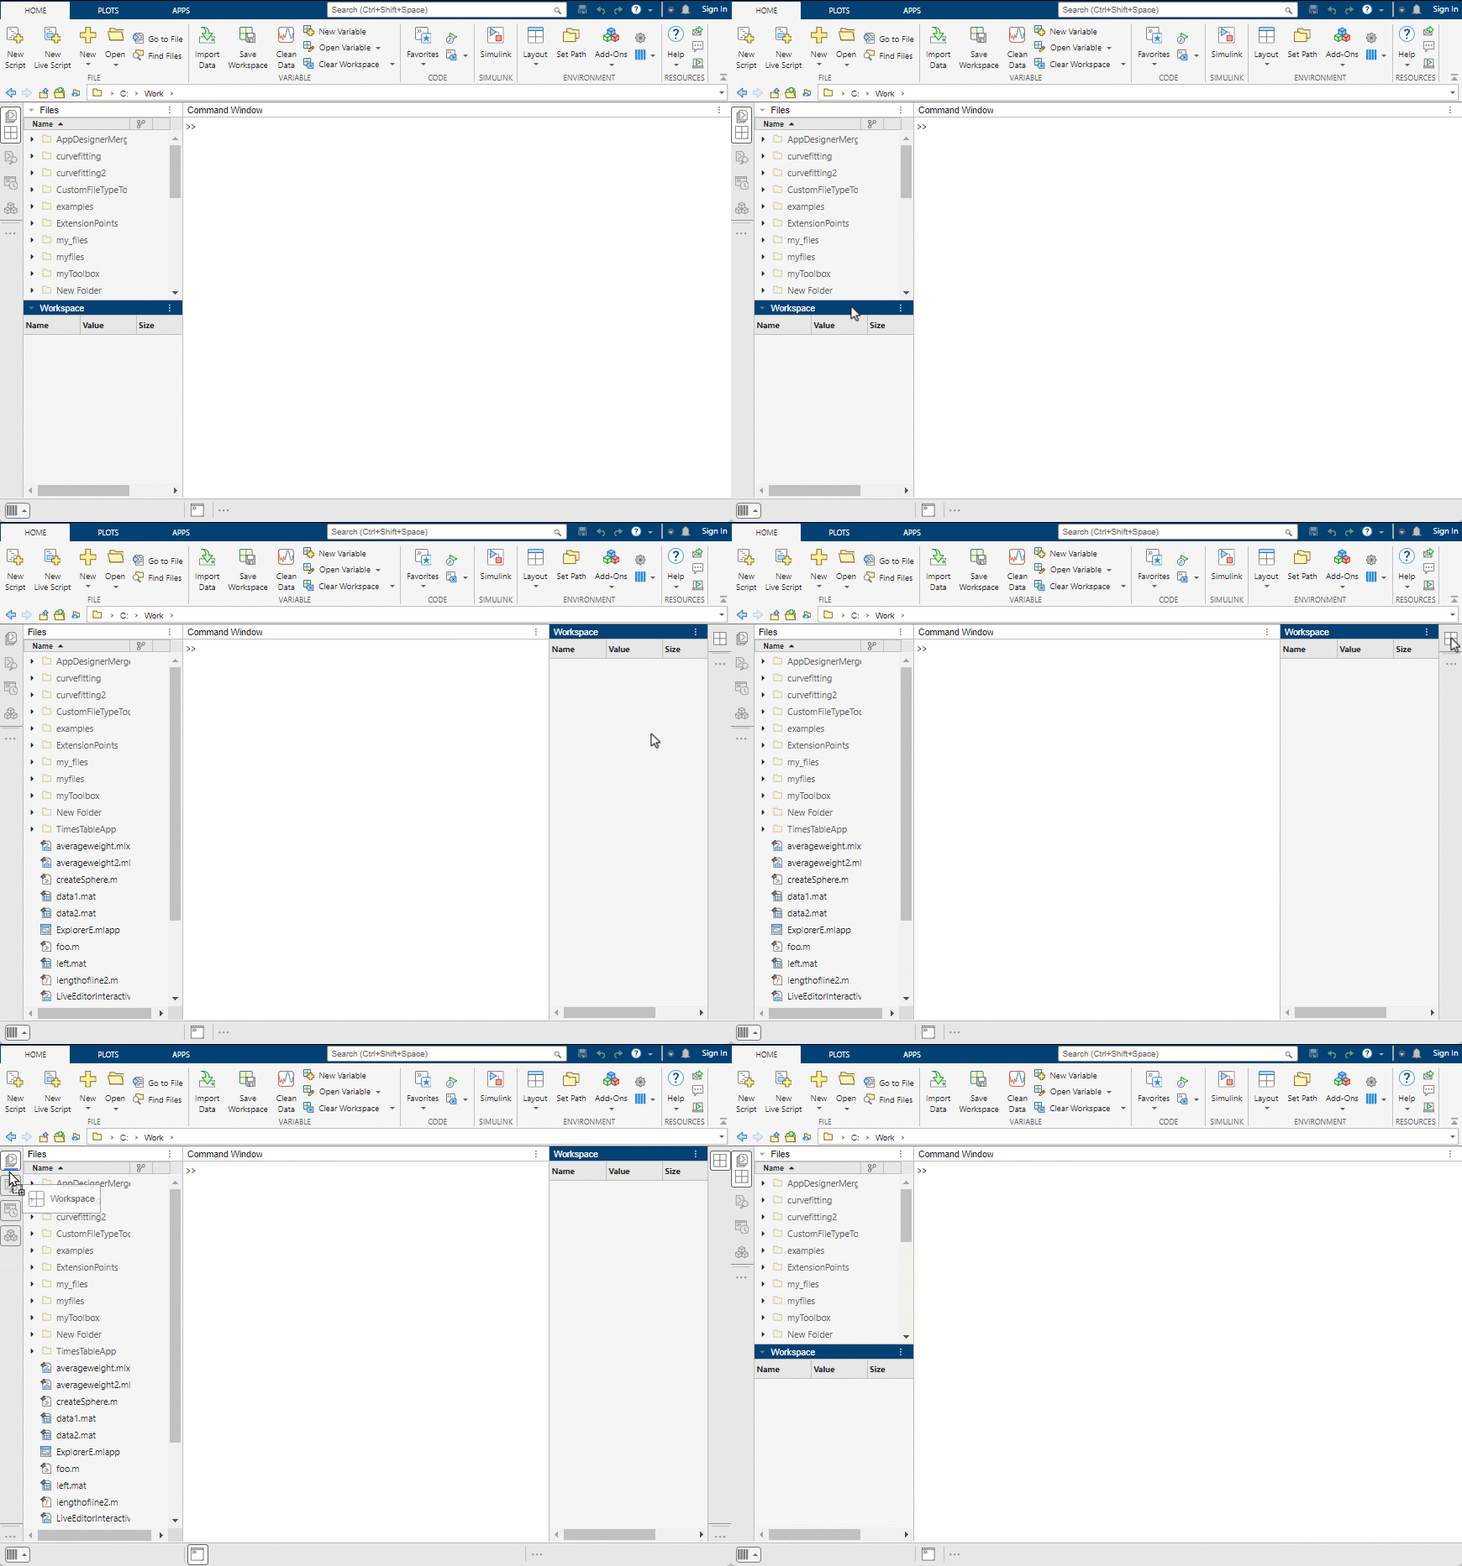
For example, to move the Workspace panel to the right side of the desktop, drag the Workspace panel's title bar toward the right sidebar. To move the Workspace panel back to its original location, drag the Workspace panel icon from the right sidebar to the Files panel icon on the left sidebar.
Move and Tile Panels in the Center of the Desktop
You can move some panels, such as the Command Window, Command History, Files panel, Workspace panel, Find Files panel, and Projects panel, to the center of the desktop. After moving a panel to the center of the desktop, you can arrange it in a tiled layout with other panels. To tile panels, click the Panel actions button at the top right of a panel, select Tile Panels, and select from the available tile options. Alternatively, drag the panel to the desired location in the center of the desktop.
By default, documents in the center of the desktop include a title bar, which
helps identify and manage document groups and panels. To show the title bar only
when hovering over the edge of a document or panel tab, click the Panel actions
button  on the title bar and select Panel Headers > Show On Hover.
Undock Panels and Documents
To open a panel in a separate window, undock the panel. You can undock the Command Window, Editor, Live Editor, Find Files panel, Code Issues panel, and Debugger panel. You also can undock the Variables editor and figures.
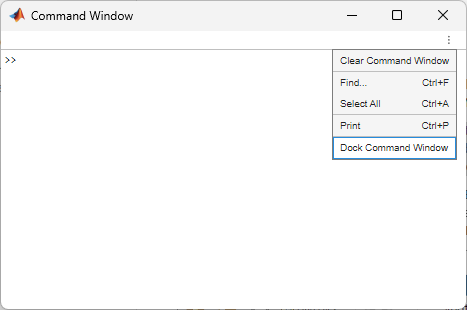
For example, to undock the Command Window, drag the Command Window's title bar outside of the MATLAB window. Alternatively, click the Command Window actions button at the top right of the Command Window and select Undock Command Window. The Command Window opens in a separate window. To dock the Command Window, select Dock Command Window.
You also can undock individual documents, such as a file that is open in the
Editor. For example, to undock the file myfile.m in the Editor,
drag the document tab outside of the MATLAB window. Alternatively, right-click the document tab and select
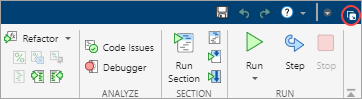
Undock myfile.m. To dock the document, click the Dock
button at the top right of the undocked Editor window.
Reorder and Tile Documents
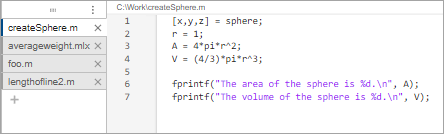
When you open MATLAB documents, they appear in the associated tool, such as the Editor or Variables editor. Individual documents open as separate tabs in the tool. To view a list of the files open in the tool, click the down arrow to the right of the tabs.
To reorder open documents in a tool, drag the document tabs to a different position. To reorder document tabs alphabetically, right-click a document tab and select Alphabetize.
To tile open documents, right-click a document tab, select Tile Tabs, and select from the available tile options. For example, to view two code files side by side, right-click one of the document tabs and select Tile Tabs > Left/Right. To move a tiled document, drag the document tab to another area.
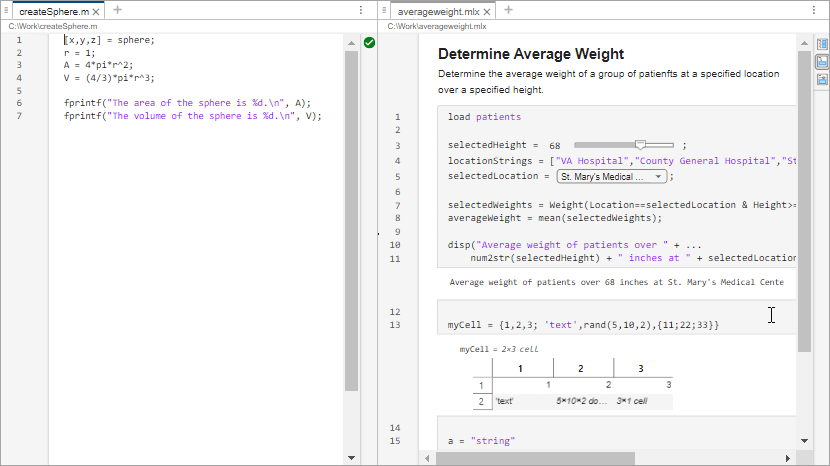
To change the position of the tabs from their default location at the top of a document, right-click a document tab, select Tab Position, and then select from the available options. For example, select Tab Position > Left to move the tabs to the left of the documents.
Minimize Toolstrip
To minimize the MATLAB Toolstrip, at the lower-right corner of the toolstrip, click the
Minimize Toolstrip button  . The toolstrip minimizes, but its tabs remain
visible. To restore the toolstrip, click one of the tabs and then, in the
lower-right corner of the toolstrip, click the Restore Toolstrip button
. The toolstrip minimizes, but its tabs remain
visible. To restore the toolstrip, click one of the tabs and then, in the
lower-right corner of the toolstrip, click the Restore Toolstrip button
 .
.

Save Desktop Layout
When you end a session, MATLAB saves your current desktop layout. So, the next time you start MATLAB, the desktop looks the same.
To save a layout for future use, go to the Home tab, and in the Environment section, select Layout > Save Current Layout. MATLAB stores all layouts in the settings folder. To open or manage saved layouts, click Layout and select your saved layout or right-click to delete or rename it.
Some tools, such as the Variables editor, do not reopen automatically, even if they were open at the end of your last session. To open specific tools at startup, use startup options. For more information, see Specify Startup Options.
Customize Quick Access Toolbar
The quick access toolbar provides access to frequently used operations, or items. This toolbar is located at the top-right corner of the MATLAB desktop and is always visible, even when you navigate between different MATLAB Toolstrip tabs.

You can customize the quick access toolbar by adding, removing, and rearranging the items in the toolbar.
Move item — Drag the item to the desired location in the quick access toolbar.
Add toolstrip item — Right-click the item on the toolstrip and select Add to Quick Access Toolbar. To remove the toolstrip item from the quick access toolbar, right-click the item and select Remove from Quick Access Toolbar.
Add common control — In the quick access toolbar, click the Common Controls button
 and select an item from the list of
common controls. To remove the common control from the quick access toolbar,
clear the item from the list of common controls.
and select an item from the list of
common controls. To remove the common control from the quick access toolbar,
clear the item from the list of common controls.Add favorite command — On the Home tab, in the Code section, click Favorites. Then, right-click a favorite command and select Add to Quick Access Toolbar. Alternatively, select both the Add to quick access toolbar and Show label on quick access toolbar options when creating the favorite command. For more information, see Create and Run Favorite Commands.

